
If you’re good with a stylus and/or can use graphic design software, you can make prints for sale on sites like Society6 or Redbubble, they have their own printing and shipping services for artists to never deal with all the complications. Or, if you wish, you can get your personal best T-shirt press machine, set up a shop in your basement, and print and ship the designs to your buyers yourself! And we can help you with some tips on using a heat press to print T-shirts.
Generally, a custom print on just about any item that can handle very high temperatures. Most often these would be T-shirts, caps, mugs, also rather frequent among individual customers are mouse pads, tote bags, and jigsaw puzzles. It is, of course, not a full list, there are more, but you will have to check out your specific machine since they have different scopes of operation. Some are designed to only heat press T-shirts/fabric, others can be configured for a wider range of products and materials.
There is no single temperature setting that will go for every item, everything depends on your particular machine as well as on what you are pressing, what material the item is made of, what you want the image to look like: both the temperature and the time you heat press affect the end result.
Usually, when people ask what temperature to set they do this out of the fear of burning the item they want to make a print on. Most often, it is about clothing items. Well, the good news here is that it is pretty hard to burn the fabric with a heat press, most of them do not offer the temperatures that can do much damage if administered the right way. The right way being, unsurprisingly, what the manual says. Following the manual is absolutely and undeniably the most foolproof method of going about the heat transferring process. However, if you want some numbers no matter what, we’d say that the generally acceptable range goes from 300°F to approximately 375°F. If you are not sure that the fabric can handle this, make a trial go with a T-shirt you won’t regret throwing away.
And before you ask, heat pressing a single item with a dedicated machine usually takes from 10 up to 30 seconds of your time.

Well, you do need your T-Shirt (or your hoodie, sweater, or cap, whatever you plan to make a print on), obviously, and the design you want to apply, but that’s besides the point.
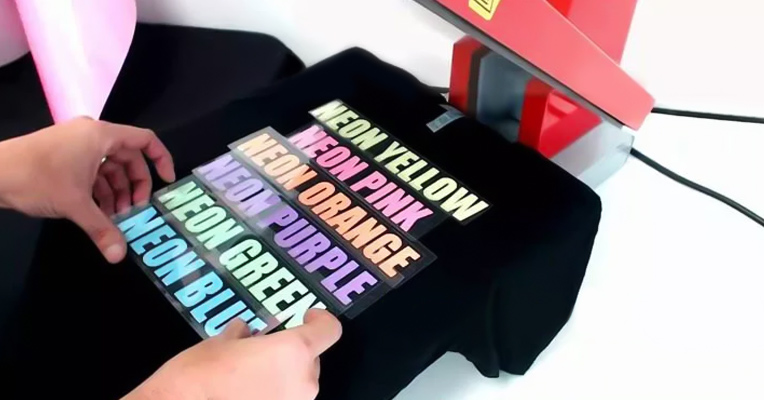
The most important thing is, of course, the heat transfer paper. You can not heat transfer images from normal paper you print your documents on. Heat transfer paper is made in a special way to allow the image to stick to the fabric when enough heat and pressure is applied. Heat transfer paper differs in price and quality, like any other item, but also in application: think beforehand if you are going to transfer onto the light or dark surface since you will need different paper in these cases. If you are buying a heat press it means you plan on starting a business and not just want to print some custom shirts for yourself and family, therefore, we suggest you buy several types of paper right away, to cater to every customer.
Then, there is a printer.
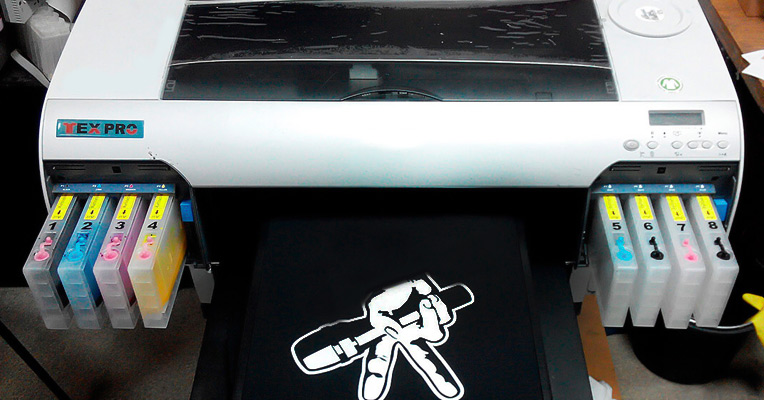
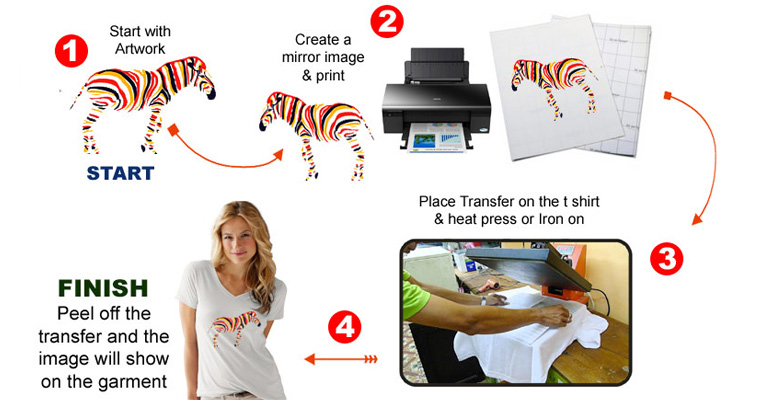
An inkjet printer, yes. Well, the paper for laser printing does exist but it is not as common. Overall, the ink and the printer do not really matter much for the heat transfer process, what matters is the paper. Therefore, you can use your usual home printer to print on a heat transfer paper. Just check that you set the paper the right way, the directions are usually written on the package. Also, when printing your design for a light-colored T-shirt, keep in mind that the transfer will mirror the image so, if you are making a text/quote print or the image that is not symmetrical horizontally, you need to flip it before printing. With the dark paper, it can be either mirrored or not so you will need to check the directions on the package.
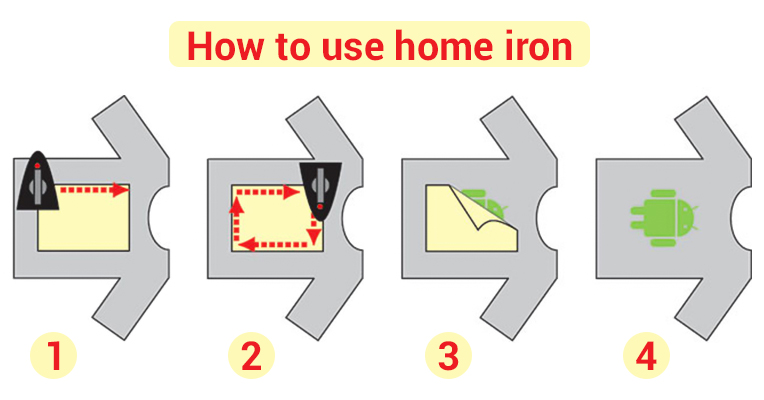
Seeing as these machines are quite costly, take a lot of space, and require a lot of power, it is not a surprise that you hesitate before buying one. You can, in fact, transfer the image from a heat transfer paper to the fabric using a home iron.
However, there are several complications accompanying this process. You will need to use the iron on maximum heat settings, find a completely even surface if you don’t have an ironing board, remember to turn off the steam, and apply ample pressure with your own hands instead of delegating it to the machine. There are also issues of even heat transfer, forgetting the corners of the image, unexpected wrinkles, etc. A lot to remember and keep an eye for. All this won’t be a big problem if you only make custom T-shirts for yourself and a couple friends and it is not a daily occurence. If you plan on doing business, though, a machine is a must: it offers less fuss with the process and creates better quality results to satisfy your clients.
Only materials that can endure extreme temperatures are suitable for heat pressing. Thin and synthetic shirts will most definitely either melt or get burnt through if you apply 350°F to them for 15~30 seconds. The most usual materials used for heat pressing are cotton, spandex, nylon, Lycra, polyester.
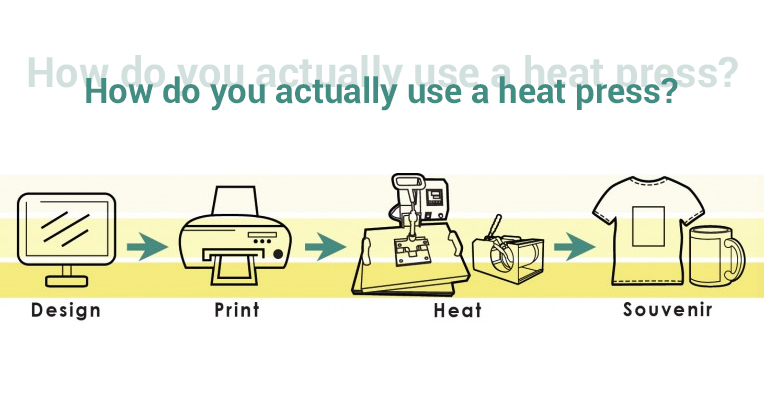
The process itself is fairly simple and the most daunting part of it is loading your clothing item on the machine for printing.
Note before starting: make a trial printing on a similar item and make the adjustments based on the result.
1) Prepare your design beforehand. Create it and print it onto the heat transfer paper.
2) You also need to pre-wash and dry the item you are going to transfer the image onto. This is done to avoid wrinkles on the image after you (or your client) wash the completed item.
3) When everything is ready and at hand, plug the heat press in and turn it on.
4) Adjust the thermostat with a thought about the material and the expected look.
5) Wait for the machine to heat up to the desired temperature.
6) Open the plates.
7) Put the clothing item onto the plate. You need to carefully consider how you are placing the T-shirt: incorrect placing will most probably result in crooked picture and you don’t want that. If your machine has lasers for proper adjustment it’s great; if not, align the tag to the back of the machine. The fabric also needs to be smoothed out perfectly to avoid creases and tears of the image.
8) It is usually recommended to preheat your garment before going on with the actual transfer. Just 10 to 15 seconds in between the plates are enough to both preheat the fabric and to smooth it (though ironing beforehand won’t hurt nevertheless).
9) Open up the plates with the T-shirt and place the transfer paper with your design onto it face down. Adjust the placement for the targeted results and close the top plate.
10) If your heat press comes with a timer, set it according to the directions on the transfer paper. If not, set your own timer.
11) When the alloted time is over, open the plate and peel off the transfer paper carefully so that not to damage the image accidentally. If you see that the edge of the image is being peeled off with the paper, smooth the paper back and put down the top plate again for some more time. Though, this is more of an occurrence when you transfer with iron and not a dedicated machine.
12) That’s it, your custom T-shirt is ready. Wait at least 24 hours before washing it, though, the ink needs to “settle in” to no be washed out.